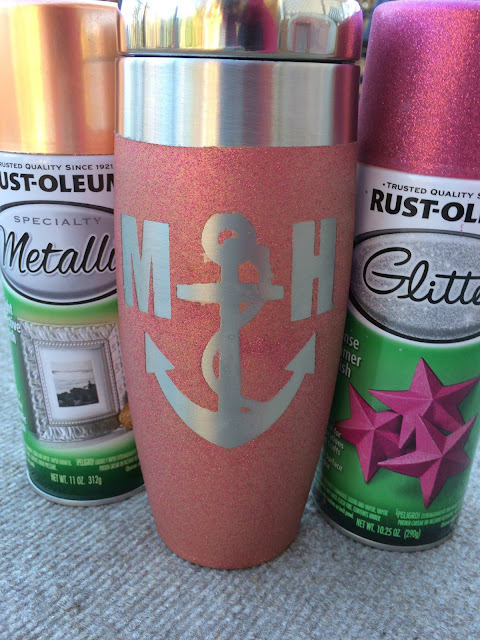
Thanks to Rust-Oleum for providing the paint as part of the Creator's Studio Blogger Challenge! This post contains affiliate links for your convenience.
I am a coffee addict and I have a to-go mug in my hand every morning when I walk out the door. I love pretty coffee mugs, but do not like spending money on them, so I only have a couple that I use daily. When I opened the box from Rust-Oleum for the blogger challenge and saw the pink glitter spray paint, I knew I had to use it to make a pretty coffee mug!
Rust-Oleum Glitter Clear Sealer
Plastic wrap
Vinyl decal cut with my Cricut Explore Air
Transfer tape
I actually had a couple of plain metal cups in my cabinet that were freebies from conferences I have attended, so I decided to use one of those. Clean the mug with rubbing alcohol prior to starting this project.
Use the Cricut Design space to pick the design for your cup. I chose a design that was not too intricate, so it would not be hard to remove the vinyl from the cup, once it was painted. I created a design using my first and last initials on either side of an anchor. Make sure to Attach the set, so all the pieces stay together when cutting.
Once the design has been cut and weeded, I used Transfer Tape to remove my design from the cutting mat and apply it to my cup. The transfer tape helps keep the design straight and together. Make sure to press it down really well and smooth out all the wrinkles.
Place a piece of plastic wrap over the mouth of the cup and secure it with painters tape. I went around the cup twice to make sure I had a good seal. You do not want any paint getting inside the cup!
Initially, I was just going to use the glitter paint, until I realized it is not full coverage. It is a clear paint with glitter in it, so it needed a base coat underneath. I chose the gold metallic as the base to create a rose gold effect when layered with the pink glitter.
I pulled out my HomeRight spray shelter, so I could paint in the garage since it was raining. I turned the cup upside down and sprayed it with two light coats of the gold metallic, letting it dry in between coats. The following day, I sprayed the cup with two coats of glitter.
Once the glitter is dry, carefully remove the vinyl stencil. The paint scratches off easily until you seal it, so use caution. You can see below I ended up with a couple of nicks in my paint.
Apply two coats of clear sealer to keep the glitter from flaking off. I actually took the vinyl off before sealing, but I would suggest removing it after the sealer dries, so the sealer does not get on the cup. Note: I would definitely recommend only hand washing this mug.
Tips for using the Glitter spray paint:
Practice on a board first. I noticed that the glitter does not go on like ordinary spray paint and it took me some time to figure out my technique.
The spray can be a little drippy, so I used short bursts of spray for the best results.
Make sure you follow the directions on the back of the can for cleaning it after use. I did not and when I went back to apply my second coat, the nozzle was clogged and I had to remove it and unclog it.
I love how this turned out and am already looking for something else to "glitter-fy!" What would you use the glitter spray paint on?


Thanks for all of the tips using the glitter spray paint! I love allllll things glitter and I've definitely been eyeballing this one at the store! I've been hesitant to try it since I didn't know if it was truly glittery or more metallic. It's good to know that it is and that I need to use sealer!
ReplyDeleteI absolutely love the way your mug turned out! If I were to use it, I'd probably paint one of my terra cotta pots - I think it'd look kinda neat glistening in the sun!
Erin, Thanks for reading! I like the glitter, buts its different from what I am used to. Oh, I may have to try it on my terra cotta pots too! I have been wanting to paint them fun colors!
DeleteI love anything with glitter! What a great gift idea! I'm definitely going to try this but need to figure out what to use for a decal because I don't have a cricut.
ReplyDeleteJill
Doused in Pink
Thank you! You could use stickers for the decal or probably find some custom ones on Etsy! You have have to let me know if you try it!
Delete