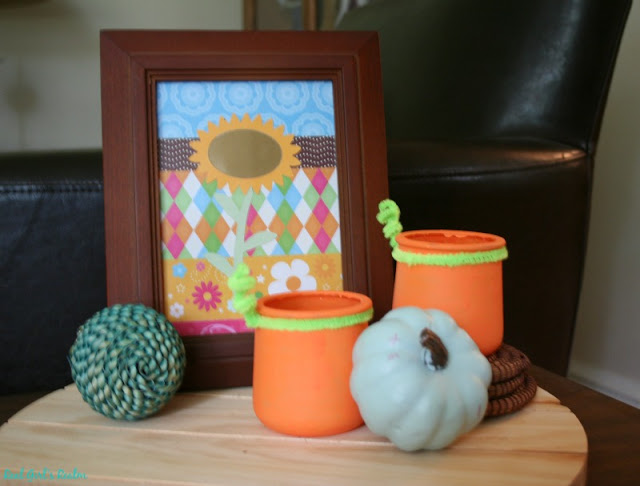
How to make Painted Glass Jar Pumpkins
Supplies:
Small glass yogurt jars
Spray primer
Orange acrylic paint
Small paint brush
Green pipe cleaners
Remove the labels from the jars: I washed the jars in the dishwasher, then soaked the jars overnight in a sink filled with soapy water and they pulled off pretty easily. The labels are made of some type of vinyl, rather than paper, so they peeled off in one piece.
Paint the jars: True confession time here...I did not have any orange paint, so I made my own using white acrylic paint and orange dye. (When you are
Once I mixed my paint, I painted 3 thin coats on the jars, letting them dry in between. The coverage still was not as good as I wanted it to be, but it would do. In hindsight, I should have used a primer on the glass jars (DOH! Mental note for next time.)
Make the "stem:" I wrapped the green pipe cleaner around the mouth of the jar and bent the end to secure it. I then took the end that was free and wrapped it around my pinkie finger to curl it, so it resembled a vine.
You could use these as a votive holder or put small flowers or other foliage in them. My husband could not really tell that they were supposed to be pumpkins...what do you think?
Head over to Curly Crafty Mom and Mom Home Guide to see what they created!
 |
| Curly Crafty Mom |
 |
| Mom Home Guide |
I still have several more jars, so comment below and tell me what you would make with them!


I have an overabundance of yogurt jars still, too! I just love how yours turned out! I love how you made your own orange paint. You def. are thrifty! The pipe cleaner stem is too cute!
ReplyDeleteCarrie
curlycraftymom.com
Thanks Carrie! I like how they turned out too!
Delete