I am just going to give you a recap of our experience, since we are not professionals...not even close. My advice would be to hire one! Really though, hanging drywall is doable by a DIY'er. We watched lots of YouTube videos and read posts from other bloggers for the best tips. We also borrowed a drywall lift from a friend which made it possible for us to install the ceiling pieces without injuring ourselves. The hardest part is cutting the holes for outlets, vents, and lighting...and making it fit.
After we had finished hanging drywall in the bathroom/laundry room area, we called our electrician friend to come install 8 can lights in the ceiling in the main living area and finish the wiring for the light fixtures in the laundry room, hallway, and mudroom area.
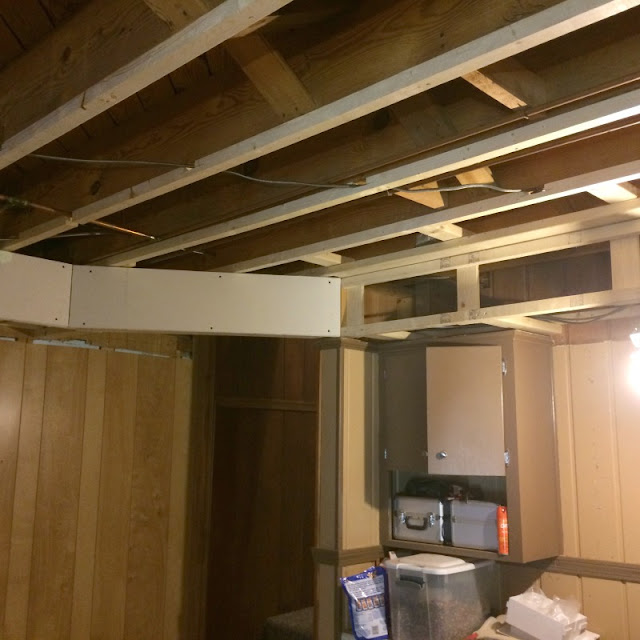
We also had our carpenter friend, Kenny come work on the main living area. We had moved as much of the plumbing, duct work, and wiring as possible, but there were still areas around the perimeter of the ceiling that needed to be addressed. Kenny suggested we box out around the ceiling, with diagonal cuts at the corners, which resulted in a trey ceiling effect. He also went ahead and hung the drywall for us in that area. Trust me, the few hundred dollars we spent to get this room finished in less than a week was well worth it.
A couple of things that made the drywall process tedious was padding out the ceiling to accommodate the copper plumbing and wiring, so we would not have to install a drop ceiling, losing headroom. We also had to frame out around some of the duct work in the hallway/mudroom area that we had painted and were going to leave exposed.
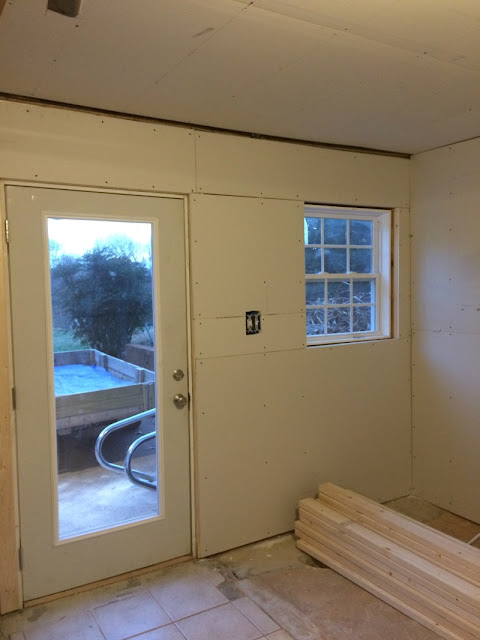
We also built the last remaining wall between the mudroom and garage and installed the door frame. (which I forgot to take pictures of during the process) We decided to leave the door off for now, until the renovation is over and we move some of the furniture pieces back in the room. Below is the mudroom area that leads to the outside. You might be wondering about that gap between the ceiling and wall. There was a bundle of wires that would have been a pain to move that kept us from running the drywall all the way up to the ceiling. We are going to address it with a piece of molding, so you will not be able to see the gap when the space is finished.
I am finally feeling like we might just finish this renovation before summer! We still have to finish taping and mudding, which has not been too bad so far. My mother is a pro at it (since her father was a drywaller by trade) so she trained us and helped us get the first coat done on most of the space.
Hope you enjoyed these progress pictures and I look forward to showing you a mostly finished space next time! Until next time, lets enjoy the HUGE difference some drywall and lighting makes.
Catch up on the other posts in this series:
And So it Begins...
Demo Time!
Breaking Ground
Let the Framing Begin
More Plumbing and Electrical
More Walls and a Door
More Demo Plus a Window and Door


Oh my gosh I can't believe you guys did that based on youtube videos!! I would be terrified haha and in general I'm a mess when it comes to house projects (the inevitable mess stresses me out) so serious props to you guys.
ReplyDeleteAmanda, If we had an unlimited budget, I would have probably subbed much more out. :-) But, I am glad we learned some new skills. I also get stressed out by messes, so I have to put my OCD aside for this project!
DeleteIt is coming together wonderfully! Great job!
ReplyDeleteThanks, Melanie! We will be glad when its finished!
DeleteSO smart to leave the door off until the end! That's one of those things that if you do it now, you'll totally be regretting it for the rest of the reno!
ReplyDeleteYour living area is looking so fab! I absolutely LOOOOVE those recessed lights!!
I agree, especially since we still have big stuff stored in the garage area. The recessed lights make such a HUGE difference!
Delete