Catch up on the other posts here:
Mudroom Built-ins
DIY Mudroom Bench
Mudroom - Installing Trim
The overall plan was to make a frame to hold the tray for stability and have a wooden insert to allow shoes to dry and drain into the tray.
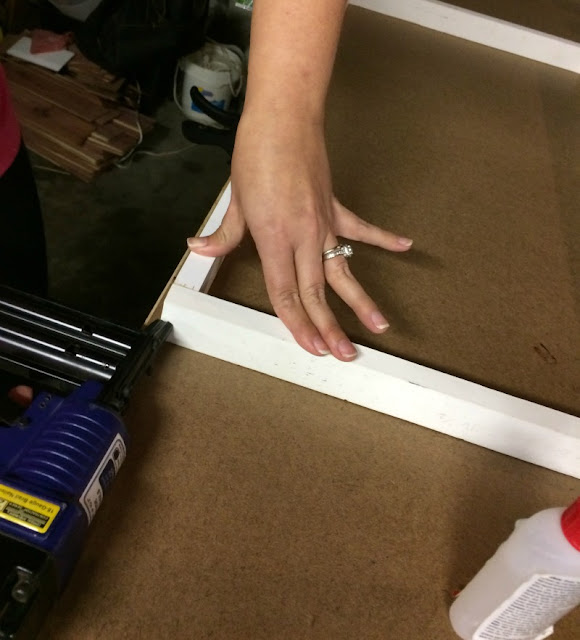
The first thing we did is measure and cut all of our pieces of wood to length so all we had to do was assemble them. I started by assembling the frame using DAP's Rapid Fuse wood glue and a brad nailer.
After the frame and insert was assembled, it was time for paint! I grabbed a gray sample from my paint stash for the frame. It was a .50 clearance find at Home Depot. (Always check the messed up paint section!) I was going to use the same color as the bench, but I used my entire sample. Luckily, I had a similar color.
Once all the pieces were dry, I attached the tray to the frame with screws on each side.
This boot tray is the perfect addition to our new mudroom. Come back next week for the final reveal!
DIY Mudroom Bench
Mudroom - Installing Trim
This post contains affiliate links, which means I receive a small financial compensation if you make a purchase using this link. Thank you for supporting Real Girl's Realm!
Supplies needed for the Boot Tray:
4 pieces of trim for the frame (cut to length)
1" x 2" pieces of wood (cut to length)
Nails
The overall plan was to make a frame to hold the tray for stability and have a wooden insert to allow shoes to dry and drain into the tray.
The first thing we did is measure and cut all of our pieces of wood to length so all we had to do was assemble them. I started by assembling the frame using DAP's Rapid Fuse wood glue and a brad nailer.
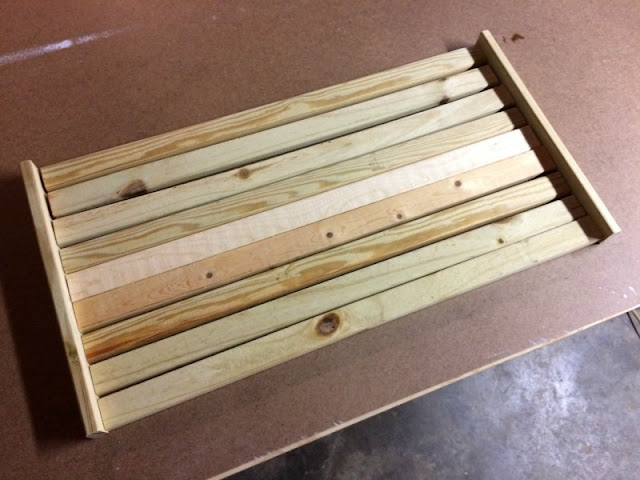
Once the frame was complete, I started on the wooden slat insert for the tray. I used a brad nailer to attach the slats to pieces on either end, so it can easily be lifted out of the tray. I used a scrap piece of vinyl plank floor for a spacer. Initially, I planned on using a nail, but I needed a little more space in between to make the slats fit evenly.
After the frame and insert was assembled, it was time for paint! I grabbed a gray sample from my paint stash for the frame. It was a .50 clearance find at Home Depot. (Always check the messed up paint section!) I was going to use the same color as the bench, but I used my entire sample. Luckily, I had a similar color.
I decided to use polyurethane for the wooden insert because it matched well with the color of the flooring and I thought it would hold up well to dirty shoes.
Once all the pieces were dry, I attached the tray to the frame with screws on each side.
Now we have a place to put wet or muddy shoes to dry, instead of on the floor. The insert lifts right out, so the plastic tray can easily be cleaned. The tray is large enough for 2-3 pair of shoes/boots.
This boot tray is the perfect addition to our new mudroom. Come back next week for the final reveal!
Pin Me for Later!


Great idea!!! And an easy DIY, the kind I like the most :) I can't wait to see all the accessories next week!!
ReplyDeleteIt really was easy! I am excited to show the reveal!
DeleteThis is such a good idea! It makes sense to have something like this versus getting a muddy, wet mess on that beautiful floor of yours! I can't wait to see next week's reveal.
ReplyDeleteThank you! I think it is going to come in handy!
DeleteThis looks really nice for a drying tray! I love it! Plus, I could so use one of these!
ReplyDeleteCarrie
curlycraftymom.com
Thank you! You should make one!
DeleteWhat a great and useful project! A boot tray is a big must for any mudroom :). Can't wait to see full reveal next week!
ReplyDeleteThank you! It turned out great and will be used a lot I think!
DeleteGreat DIY! Looking forward to the reveal.
ReplyDeleteWe have been looking to build a boot tray for our garage, this is absolutely perfect!!! Thank you for doin g DIY tutorial it will make this project go some much quicker now :)
ReplyDeleteThis was a simple tutorial and we were able to use scrap wood and paint we had on hand, so it cost less than $10.
DeleteNow THIS is a boot tray that looks like it's built for winter!
ReplyDeleteThanks! I think it will come in handy!
Delete