This post contains affiliate links for your convenience, which means I receive a small financial compensation if you make a purchase using this link. You can read more about affiliate links here.
I am back with the Craft & Create with Cricut Challenge to bring you a Wooden Summer Sign project. Each month we will bring you a different themed craft using the Cricut, so make sure you subscribe to my email so you don't miss any of these crafts!
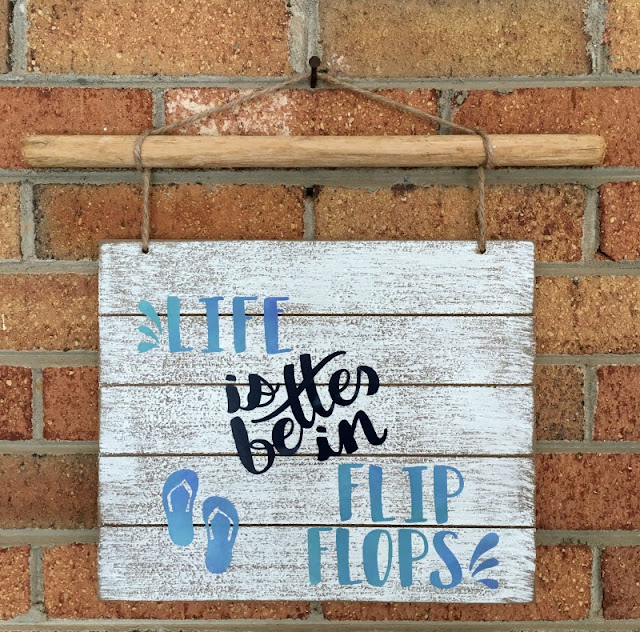
This month we are making Summer themed crafts using our Cricut and I am sharing a wooden sign I made using patterned iron on vinyl and regular vinyl. Did you know you could use Iron On vinyl on wood? I didn't, until I saw several other bloggers doing it! It actually sticks a lot better than regular vinyl and it only takes a few seconds to apply when using the Cricut EasyPress.
Supplies needed for wooden sign:
Blank wooden sign (I found this one at Michaels)Cricut Explore Air
Cricut EasyPress
Iron on vinyl
Vinyl
Standard grip mat
I opened up Cricut Design Space and chose an existing project that said "Life is better in flip flops." I then searched the free images for a pair of flip flops to add to the quote. I wanted to have a color variation on the sign, so I used a watercolor pattern of iron on for the "Life" and "flip flops," along with the flip flops and navy blue for the "is better in."
I have found that regular vinyl does not stick well to canvas or wood in general, so I prepped the area with Mod Podge and let it dry, before applying the regular vinyl. Once the Mod Podge was dry, I used transfer tape and the scraper tool to apply the vinyl to the sign. I also put another coat of Mod Podge over the area for good measure.
Now I have a sign to hang out by the pool to remind us what summer is all about! What would your Summer sign say?
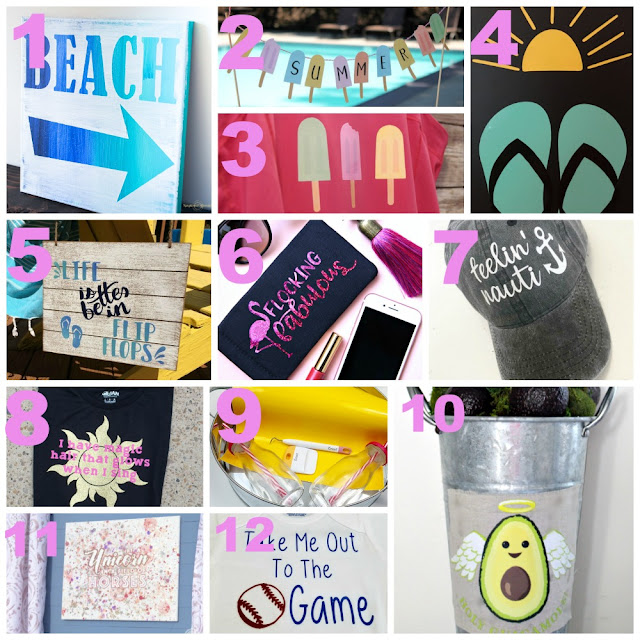
Now head over and check out what my friends made with their Cricut machines by clicking on the links below, then comment with your favorite!
- DIY Beach Art
- Personalized Popsicle Banner
- Summer Tank Top using Printable Iron-On
- Flip Flop Summer Sign
- Wooden Summer Sign with Iron-On Vinyl
- Flocking Fabulous Sunglasses Case
- Summer Ball Cap DIY
- Rapunzel Magic Hair Disneyland Shirt
- Summer Sun Drink Tray
- Holy Guacamole! It's An Avocado Topiary!
- Fun Summer Unicorn Canvas
- Take Me Out to the Ballgame Onesie
- Disclosure: I am part of the Cricut Blogger Program and may receive supplies to complete my projects, but all thoughts are 100% my own. I love my Cricut and am excited to share my projects with you!


My sign would say the same! I love flip flop decor for summer. I love putting HTV on wood, it just looks awesome! Pinning!
ReplyDeleteThank you! This was the first time I tried iron on on wood, but I will not do it any other way now!
DeleteLove it! This saying is so me! I agree, iron-on looks so much better on wood than regular vinyl. It looks like it's part of the wood, as if it were painted on!
ReplyDeleteIt really does! I can't believe how nice it turned out and how easy it was!
DeleteI'm definitely making an iron-on wood sign soon! You had some great tips, too, like using Mod Podge. I'd feel more confident ironing on wood I think because I wouldn't worry as much about burning it.
ReplyDeleteIt was so easy to iron on wood. I think using a plastic barrier really helps too! Let me know if you make one!
DeleteI have never tried heat transfer vinyl on wood before, but this is good to know. Also, I wonder if I could use that Circuit Heat Press for my Silhouette projects. I bet I could... vinyl is vinyl, right? So cool!! You totally inspired me with this post. I love the sign and the texture/color of the wood, too!
ReplyDeleteCarrie
curlycraftymom.com
Thank you! I am sure you can use the Cricut Heat Press. There is nothing special that you could not use it with any kind of vinyl. You would just follow the directions depending on the material you were putting the vinyl on. I had not used the iron on wood before either but it turned out so much better than I thought!
DeleteI have never done iron on on wood! So glad you tried it and had success!! I love this sign!
ReplyDeleteI was surprised at how well it worked and how great it looks!
DeleteI like how versatile the heat transfer vinyl can be.
ReplyDeleteI agree! I think it is my favorite material to use!
DeleteI love the colors you have chosen for the wording! Very Summery and mermaid-like :)
ReplyDeleteThanks! Yes, I love the watercolor vinyl...so mermaid-y!
Delete