This post contains affiliate links for your convenience, which means I receive a small financial compensation if you make a purchase using this link. You can read more about affiliate links here.
Supplies needed for DIY Clipboard Wall Art
Cricut Machine
Cricut LightGrip Cutting Mat
Cricut Iron-on Vinyl
Cricut Weeding Tool
Cricut EasyPress 2
Cricut EasyPress 2 Mat
Clipboard
Paint (optional)
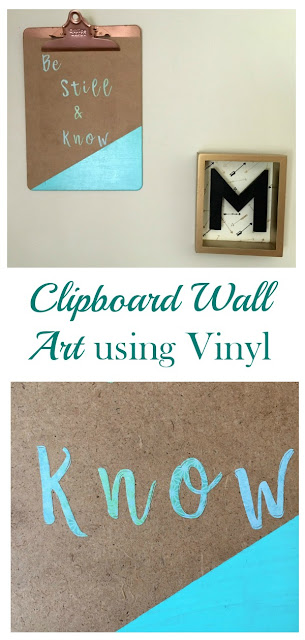
If you would like, you can paint the hardware and corner design on the clipboard, letting it dry before you get started with the quote.
To create the iron on quote:
Open Cricut Design Space and create a New project. I chose to add text with the quote "Be Still & Know" from one of my favorite Bible verses. Place the vinyl shiny side down on the cutting mat, Mirror the image in the software, select your material, and start the cut. Once the cut has completed, remove the vinyl from the cutting mat and weed the excess vinyl from the design. Place it face up on the clipboard.
Preheat the EasyPress 2 according to the material instructions and apply heat to the design until the timer on the Easy Press 2 beeps. Carefully peel away the liner, making sure the vinyl is stuck to the surface. If it is not, then apply the EasyPress 2 again.
Pin me for later!
Now head over and check out what my friends made, by clicking on the links below, then comment with your favorite!
Buffalo Check Wooden Pumpkin from Weekend Craft • Inspirational Candles from Happy Go Lucky • Rustic Wooden Sign from Refresh Restyle • Paper Pumpkins from Create & Babble • Charting Embroidery with the Cricut from The Kim Six Fix • Rainbow Bookends from SeeLINDSAY • Dollar Tree Sign Upcycled For Fall from Daily DIY Life • Coco Inspired Pillows from Upright and Caffeinated • Pumpkin Spice Latte Towel with the Cricut EasyPress from Cookies, Coffee and Crafts • Fall Inspired Sign from Every's Creations • Quick and Easy Home Decor with Your Cricut: One Cricut SVG File 12 Ways! from Happily Ever After, Etc • DIY Clipboard Wall Art from Real Girls Realm • Welcome Fall Cricut Shadow Box from the Inspiration Vault • Fall Wreath from Our Crafty Mom
Disclosure: I am part of the Cricut Blogger Program and may receive supplies to complete my projects, but all thoughts are 100% my own. I love my Cricut and am excited to share my projects with you!


Super cute idea! I love quotes and great idea to put it on a clipboard.
ReplyDeleteThank you! It was a great way to re-purpose something I was not using!
DeleteDo you know how many times in my life, I wish I had a clipboard? No, seriously. Totally weird, but yah know. Love the blue you chose :)
ReplyDeleteYou are so funny! I found several while cleaning out school/office supplies and painted them to hang on the wall!
Delete