Thanks to Rust-Oleum for providing the paint as part of the Creator's Studio Blogger Challenge! This post contains affiliate links for your convenience.
I have had two wooden crates c/o Crates and Palllet sitting around for months, while I was trying to decide how to use them. I have been pinning a ton of storage ideas for inspiration, but could not settle on one idea. When I was selected by Rust-Oleum to participate in their Creator's Studio Blogger Challenge, I decided I was going to finally make a storage project using the crates.
The only requirement for the challenge is that I had to use at least one of the products in the box. The box contained several goodies: Glitter spray paint, chalboard spray paint, mirror paint, chalk gray spray paint, green spray paint, and a couple of cans of stain. I am pre-disposed to go with the spray paint, because that is truly my jam, but I decided to try the stain. Don't worry, I am sure you will see the spray paints used for future projects...I already have a couple in mind!

We do not have much storage in our guest bathroom, so we keep all the towels and washcloths in the linen closet in the hall. When we have guests stay the night, I have to remember to lay out towels for them. (which I am not always good at) I decided to use the two wooden crates to make a rolling storage cart that I can fill with towels and toiletries when we have guests.
Supplies:
Rust-Oleum Varathane wood stain in Bleached Blue
Scrap wood
(2) Wooden crates
(4) screws
(4) Casters with rubber wheels
(16) nuts/bolts or screws (to attach the casters)
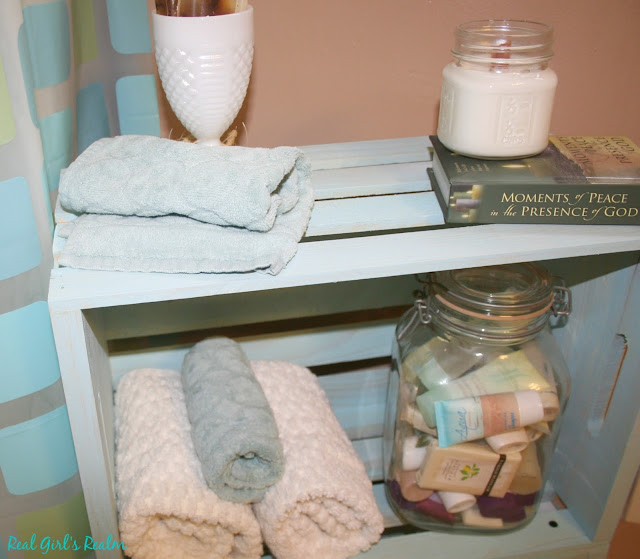
I used Rust-Oleum wood stain in Bleached Blue, which matches the color scheme in the bathroom. I just applied one coat to achieve a weathered look.
Once the crates were dry, I assembled them by attaching them to each other on one of the long sides. To make the crates more sturdy, I placed a piece of 1x1 on both sides of the top underside of the bottom crate to have something to screw into. Tip: I used a clamp to hold the crates in place while I screwed them together.
Because the crates are not very thick, you will need to pad the bottom before you attach the casters. I used a scrap piece of plywood cut to size and a piece of leftover cedar from our closet project. Pre-drill your holes prior to attaching the casters, so you do not split the wood. Attach the casters at each outside edge of the crate for stability.
This rolling storage crate shelf fit perfectly in the corner by the shower and can be rolled out of the way, when it is not needed. I will probably even move it down to our basement bathroom once we finish it.
Where could you use some extra storage in your house?


This is perfect. I could use a few of these!
ReplyDeleteThanks Jenny! I want to make a couple more now!
DeleteI pinned this on Pinterest before I even realized it was yours! I love it! I also love the bleached blue stain, I have always wondered what these kinds of stains looked like actually on something (since I've only seen them in the can at the hardware store)
ReplyDeleteAwwww, that's so awesome! Yes, I like how the stain turned out...it was a nice coverage!
DeleteI love this project! My daughters could use something like this in their bathroom. I recently used crates to convert a coat closet into a pantry!
ReplyDeleteThank you! It is so convenient and can be moved around as needed.
Delete