This post contains affiliate links, which means I receive a small financial compensation if you make a purchase using this link
If you have been following along with my basement renovation saga, you will know that our original plan was to tear up all the tile and install vinyl flooring throughout the entire space. A few months ago, after tearing out the tile in the mudroom, we realized it was a pain in the butt to chip up the tile and mastic....and it created a huge mess. On top of that, we had to spend a few hundred dollars on concrete leveler to prep the area for the flooring. So, we started trying to come up with a Plan B and ultimately decided on Painting the Tile.
We honestly hated the tile and needed to replace it since a portion was missing where the kitchenette and dividing wall was, but sometimes you have to change plans. The first problem was how to fill in the hole since we did not have enough extra tile and did not know where it came from. We lucked up and found some tile that was very close to it at the Habitat Re-Store, so we purchased two boxes of 8 for $11 a piece. Since we were painting them, the color didn't matter as much as the size and texture.
My hubby did a great job at putting down the couple of rows that were missing and grouting it. The next step was cleaning and prepping the tile for paint. Since the original plan was to take up the tile, I had not cared about getting paint and drywall mud all over them, so this is what the floor looked like.
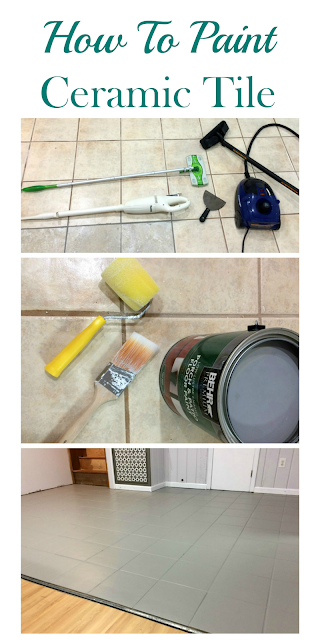
Here is what you need to get started (affiliate links):
Prepping Ceramic Tile for Paint
First, I used a scraper tool to remove the blobs of paint, drywall mud, and grout; then I vacuumed really well. I love this stick vacuum from Makita; it uses the same rechargeable batteries as our drill and driver sets which is super convenient. We bought it to clean the hardwoods upstairs and it is perfect for getting up dog hair!
Next, I broke out my handy HomeRight Steam Cleaner to blast away the rest of the dirt and paint. I was pleasantly surprised at how well the paint came up off the tile! I could not get it out of the grout, but it didn't matter since I was painting over it anyway.
Finally, I used a Swiffer dust pad to make sure the tiles were dry and free of any debris. Can you believe how dirty the floor was?!?
Painting Ceramic Tile
I was inspired by the stenciled tiles in Lolly Jane's bathroom, but instead of using chalk paint, I opted for a Behr Porch & Patio Floor paint, which I thought might hold up better. I sealed it with a water based polycrylic from Minwax.First, I taped off the bottom of the walls and baseboard. Then, I used a small angled brush to paint along the edges and grout lines and a small roller for the tiles. I applied two coats of the floor paint, allowing to dry in between coats. After the floor had dried for a few days, I sealed it with two coats of the polycrylic top coat.
It only took me a little over an hour to paint this space! It makes such a huge difference in the look of the room and the gray floor ties in with the updated built-in cabinet and freshly painted walls. Now if I can just get my husband on board with the stenciled look!
What's your opinion on the stencil? Yay or Nay?
Next up...installing baseboards and painting the stairs, so stay tuned!
Pin This for Later!


This turned out great. I like the color that you picked out.
ReplyDelete