
With school starting back this week, I am in full-on organizing mode. I am naturally an organized person, but I am always looking for ways to make my family's life easier and keep track of our schedule, bills, keys, etc. Our house was built in the 1960's and has a desk nook in the kitchen. My husband wants to get rid of it, but for the time being it does serve a purpose as a handy dumping ground for my purse, keys, mail, and houses our "junk drawer."
My goal was this make this area less cluttered and more functional. You can see where the previous owners had some kind of picture hanging there and then there is the hideous landline outlet.

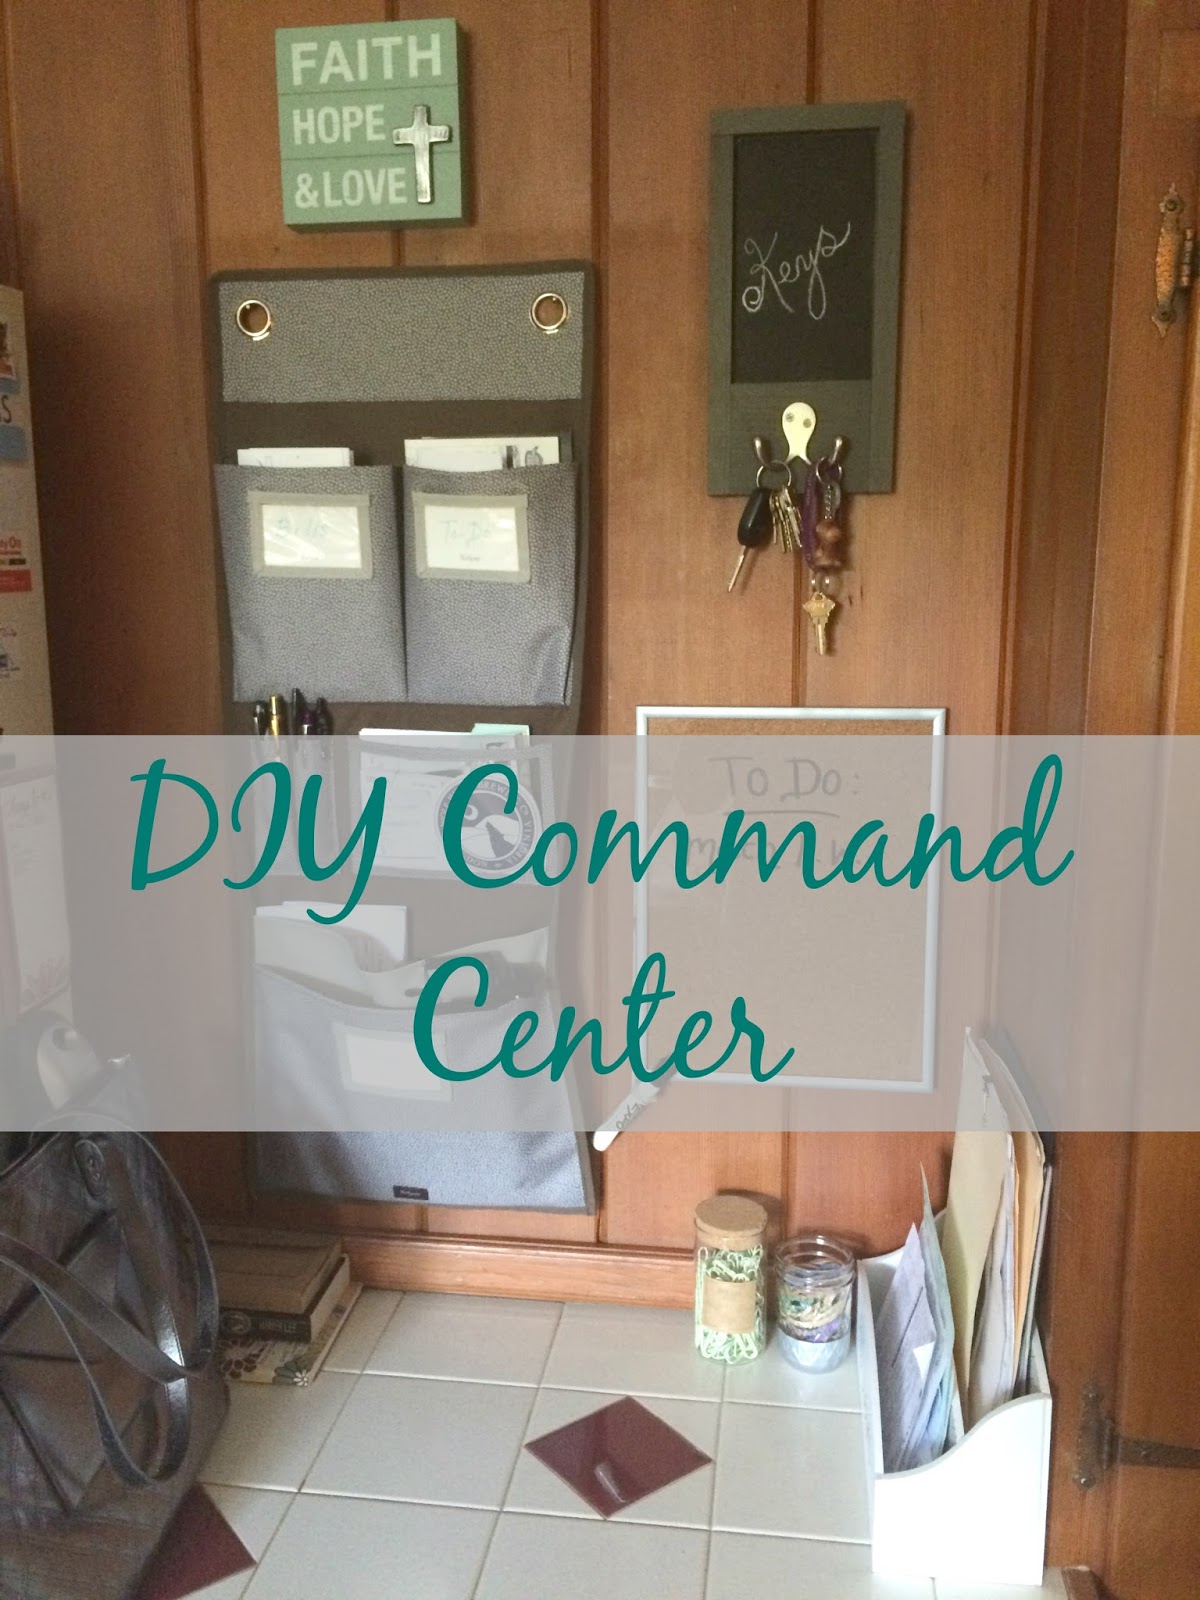
I purchased a hanging pocket organizer for less than $10 from Thirty-One last year when they were having a clearance sale. This is perfect for storing bills, paperwork to be signed, appointment cards, and other things that need to be taken care of.

I also wanted some type of dry-erase board where I could write reminders or notes. I found a great idea on Pinterest where you could use a frame and write on the glass. I already had a cheap, black 8x10 frame that I spray painted with Rust-Oleum metallic silver. (left over from other projects) I also had some cork contact paper, left over from my medicine cabinet makeover, that I adhered to the cardboard piece inside the frame, for a unique background for the dry-erase board.

While I had the paint out, I taped off the top half of a mason jar and painted it for some decorative storage for our rubber bands.

While at the Haven conference, we assembled a mini chalkboard kit from Crates & Pallet in the Ryobi session. This was the perfect piece to hang our keys on (which we always seem to be looking for!) I gave it a coat of paint, using Valspar English Tea Party, left over from my nightstand makeover. It matches the color of the organizer perfectly!

I found a cute, (Aff link) wooden mail organizer on clearance for $8 at TJ Maxx, which I am using to hold larger paper items, like folders, pictures, and school papers.

For less than $20, and using materials I already had on hand, I was able to make an awkward area of our kitchen more functional for the entire family!

Do you have a command center? If so, what is your must have item to keep you organized?


Love it!!!! You are awesome!
ReplyDeleteAww thanks Karen!
DeleteWe also have a built in desk in our kitchen although ours isn't quite as old as your house. We used it for a desk and threw all of our crap on it. When my oldest started school 3 years ago, it became our command centre for some stuff and then we had a bulletin board in our mud room with other stuff and I hated it. I moved our iMac up to our bonus room desk and moved our macbook down to this area and then hung a large cork board behind that i could see now with the desktop computer gone. Here was our main calendar, invites and school calendars. I had filing system but it wasn't working for me, so a few weeks ago I scrapped it and bought 2 magazine rack holders from winners and made one "in" and one "out" and so far so good!!
ReplyDeleteIt does seem to become a catch all, so i am hoping it will stay this organized!
DeleteI like the painted jar. Nice touch!
ReplyDeleteIt adds a little bit of bling for sure!
DeleteI seriously LOVE this! Recently moved, things are still a mess. I've been looking into a key hanger thingy majig and love your cute idea with the chalk board.
ReplyDeleteThe Key thingy is awesome! I was always searching for my keys in the morning...they were either in the bottom of my purse...aka...black hole or on the counter under a mess, so now I can find them! Hopefully it stays this organized :)
DeleteLove the holder! I've found that every time I pretty up an area, like your organizing corner it's much easier to use and stick with the plan. Maybe it's because it looks new? Anyhoo, good job! XO-Wendi@H2OBungalow
ReplyDeleteThank you Wendi! Yes, I hope making it pretty helps us keep it that way!
DeleteThat is definitely organized. I need some of your skills! I put a simple file size basket on my table thinking that would help with the drop off zone but I couldn't keep up. Yours is a good idea.
ReplyDeleteThank you so much for the kind words! I hope this will inspire you to create your own area!
DeleteGreat article ...Thanks for your great information, the contents are quiet interesting. I will be waiting for your next postFurniture stores... see here
ReplyDelete